 Software to facilitate the digitalisation of analogue music is increasingly widely available. The Windows Sound Recorder is not suitable, since it doesn’t allow for recording of more than 60 seconds.
The application we’re going to use in this tutorial is Audacity. This is quite a sophisticated audio editing program, and we’ll only be using a small subset of it’s functionality for the purposes of this tutorial. Importantly, it provides level metering to enable the input volume to be adjusted to the optimum level for audio recording. It’s other big advantage is that it’s free!
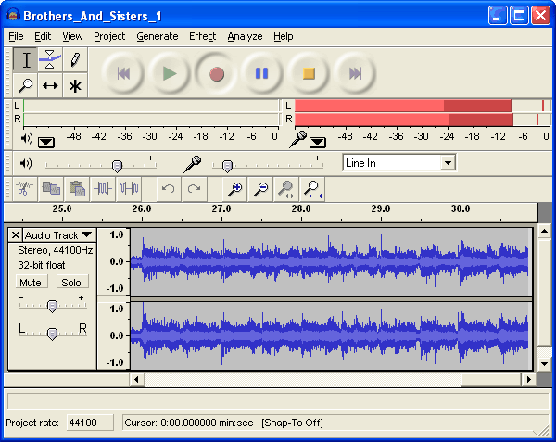
The Mixer Toolbar provides a graphical interface to your sound card’s settings:

- the Output and Input sliders will jump to zero (left-most position) if the drivers do not expose these functions
- the content of the Input selector drop-down menu will vary, depending on the features provided by the sound card.
Before commencing recording proper, you need to adjust the recording level to avoid digital clipping, which occurs when the input volume level is too high, causing distortion during the playback of your music.
To do this, set the Input selector to Line In and make a trial recording of one of the loudest sections of music on the LP to be recorded. It is important to use a representative sample of the loudness of the music to adjust the recording level. If you subsequently record music that is significantly louder than the section of music that you used in this step, you risk the possibility of distortion.
The Input Slider actually controls the input level of the selected setting of the sound card driver. The associated level meter displays two red bars that show the amplitude of the left and right channel input. A static marker beyond indicates the most recent peak input level.
The Meter Toolbar is used for monitoring the input and output audio levels:

Typically it is used to make sure that the average sound is as loud as possible, for maximum fidelity, without clipping …. and that’s precisely what we’re going to use it for in making our trial recording. The output (playback) meter is the green one, and the input (recording) meter is in red. Normally they’re only active when you’re playing or recording audio.
The top bar shows the left channel and the bottom bar the right. The brightest part of the bar shows the average audio level; the darker part of the bar shows the peak audio level. The peak-hold line on the right of this shows the maximum audio level reached in the last three seconds. Finally, the clipping indicators on the far right of each meter will light up if clipping – meaning that the audio is too loud and will sound distorted – is detected.
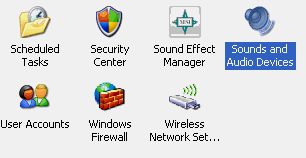
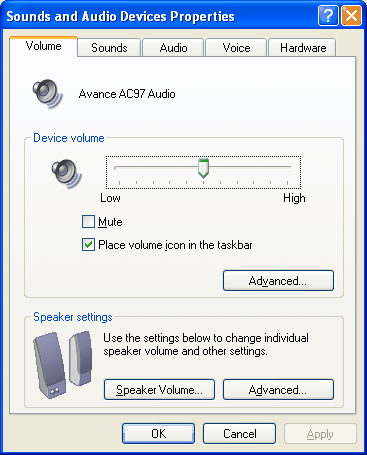
If clipping occurs during the trial recording, you should lower the volume of your input source. If you’re using a specialist pre-amp with volume control, this is easy to do. Otherwise you can try to do this by lowering the volume of the external input source via it’s driver settings. To do this, double-click My Computer and click Control Panel.

Double-click Sounds and Audio Devices …

… to display your sound card’s properties.
Adjust the volume as appropriate.
Alternatively, or in conjunction with this, you can try lowering the input level using Audacity’s Mixer Toolbar.
When you’re happy that you’ve identified a recording level that results in playback of sufficient volume, but with no distortion, you’re ready to commence the recording session proper.

The easiest way to do this is to record a complete side of an LP per recording.