To open Movie Maker, click Start > Programs > Accessories > Windows Movie Maker.
Select Capture from video device to launch the Video Capture Wizard.
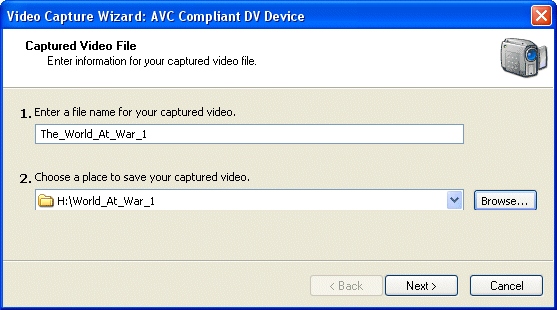
Enter a name for the file you’re about to capture and a location where you wish to store it.
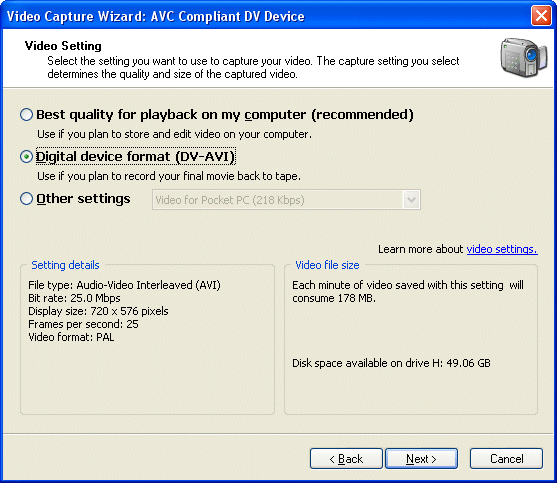
Select the DV-AVI format …
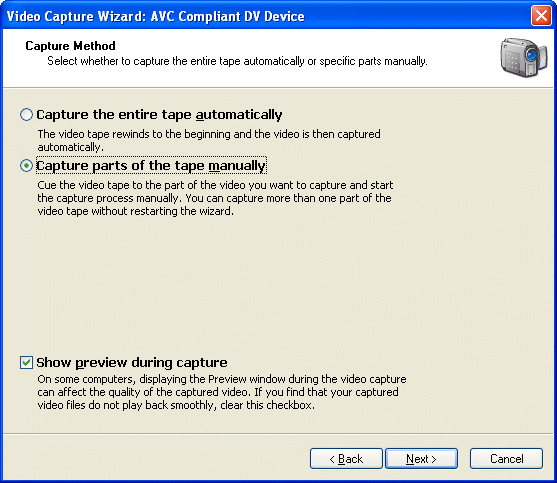
… and then the option to Capture parts of the tape manually.
Start playing the video cassette tape on your VCR deck …
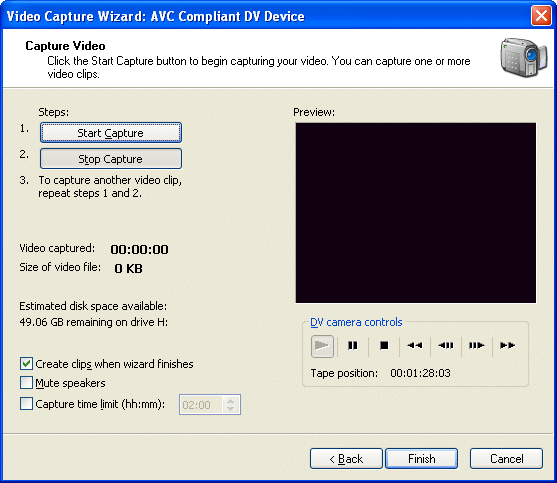
… and use the Start Capture and Stop Capture buttons to determine the portion of video to be captured.
You can subsequently use Movie Maker to play the captured test portion of digitised video, to check the quality of both video and audio.
- Transfer VHS to DVD Method
- VCR to DVD – Video Digitisation and Compression Codecs
- VCR to DVD Conversion – Video Capture Cards and PC Hardware
- How to Transfer VCR Video to DVD – Preparation
- Converting VCR Video to DVD Using Canopus ADVC-55
- Connecting External DV Converter Hardware to VCR and PC for VHS Video to DVD Transfer
- Testing the External DV Converter
- Installing the Software for the ADVC-55 DV Converter – including NERO
- One-Click Operation of VHS Video to DVD Transfer Using ADVC-55
- Rip / Import / Copy VCR VHS Video and Burn to DVD with Nero
- Labelling your DVDs – tutorial on how to transfer your VCR tapes to DVD
