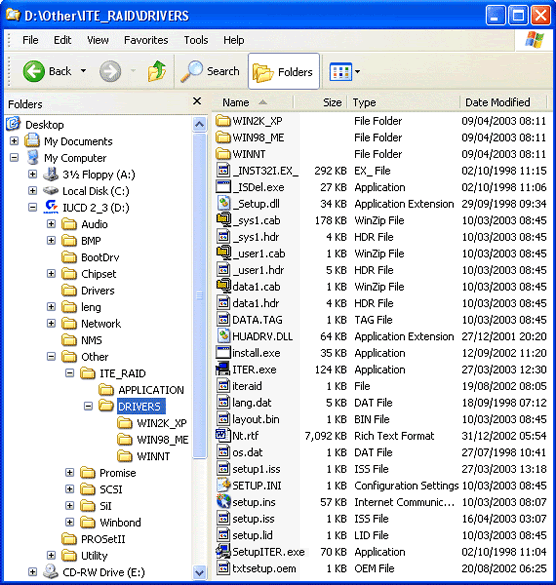
You’ll need first to complete a couple of preparatory steps:
1. Create a floppy disc containing the relevant RAID Controller drivers
Locate the relevant drivers on the supplied CD-ROM. In this case, they’re labelled ITE_RAID drivers.

Copy the files in that folder and the relevant operating system folder/files (in this case WIN2K_XP) to an empty floppy disc. This will be used later, during the Windows installation.
2 – Make sure you configure your system BIOS to boot from your CD-ROM drive
Press DEL to enter after powering-on your system to enter your system BIOS’s Setup program. Note that although the keypress to access BIOS is commonly DEL it can vary between computer manufacturers. Common alternatives include F2, F10 or ESC, but watch onscreen during the boot process and there will almost certainly be a prompt, or refer to your computer’s documentation.
Once you have accessed BIOS, go to Advanced BIOS Features and set the boot sequence to boot from your CD-ROM drive first.
Make sure you save the setting.
- RAID tutorial – the benefits of using RAID
- RAID tutorial – preparing for the installation
- RAID tutorial – connecting the hard drives
- RAID tutorial – configuring a RAID array installation
- RAID tutorial – installing the drivers
- RAID tutorial – installing Windows on the RAID drive
- RAID tutorial – maintaining the RAID array