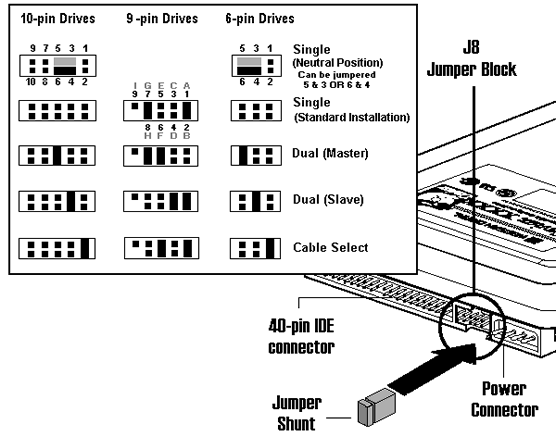
In fact, it’s not the particular IDE ribbon cable connector that determines whether or not a drive is a master or slave, but rather the way in which the drive’s jumper pins are configured. EIDE hard drives typically have a jumper block located between the 40-pin IDE connector and the power connector, on the rear of the drive. These jumpers select the physical detection options on the hard drive.
There’s often a sticker on top of the drive explaining the necessary jumper settings – as with the drive being used here. The information will also be present in the drive’s user manual.
Failing both those options, this page has links that’ll lead you to jumper settings for all of the principal hard disk drive manufacturers.
As it happens, both the existing drive and new drive relevant to this tutorial are made by the same manufacturer, and both need to be reconfigured for the new master/slave arrangement. The above-referenced page leads to a page on Western Digital’s web site with the information required to accomplish this:

So, this information allows the existing 9-pin drive to be correctly reconfigured from a Single to a Dual (Master), and the new 10-pin drive to be reconfigured as a Dual (Slave).