The final task is to fine-tune your Windows installation, especially if you elected to Install the most common components during the course of the installation.
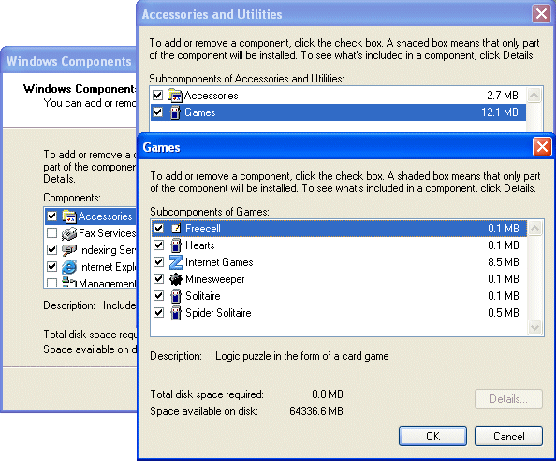
You can do this by clicking Start > Settings > Control Panel > Add/Remove Programs and then selecting the Add/Remove Windows Components option. Setup searches for and displays the installed components. The check boxes indicate whether or not a component is installed, shaded check boxes denoting that only part of the component is installed.

Where present, clicking Details brings up a second dialogue box which describes precisely what’s installed and what isn’t. Select or clear check boxes to modify your selection as required. The net change in the disk space requirement will be shown. When you’re happy with your current selection, click OK. You’ll be asked to load the Windows XP CD-ROM. The selected components will then be installed.
It’s also not a bad idea to check that your regional settings are as you intend them to be now. There’s nothing more annoying than discovering when you’re in a rush that, for example, the @ key on your keyboard is working as expected!
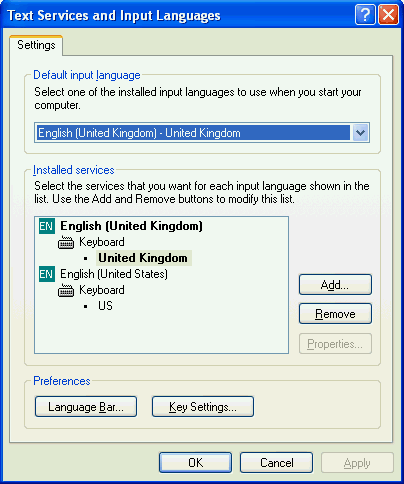
To check your keyboard settings, click Start > Settings > Control Panel, double-click Regional and Language Options, click the Languages tab and Details.

On the Settings tab, make sure you have the correct keyboard layout enabled.
- WinXP Installation Planning
- Windows XP Upgrade Advisor
- WinXP Installation Information Collection
- WinXP Installation
- How To Do a Clean Installation of Windows XP – Phase 1
- Dynamic Update – How to do a clean installation of Windows XP
- Preparing Installation – How to do a clean installation of Windows XP
- WinXP Installation Phase 4
- WinXP Installation Phase 5
- WinXP Windows Update
- WinXP Driver Installation
- WinXP Installation Tuning
- Files and Settings Transfer – How to do a clean installation of Windows XP