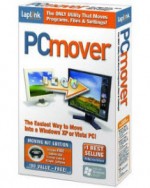
PROS: Pcmover is the only data migration software package that can transfer over software programs as well as all user accounts, custom settings and personal files.
CONS: While the software program works great, some users may have a hard time settings the transfer up. We recommend you purchase the pro version that comes with a data transfer cable to make things go smoother.
OVERVIEW: All in all PCmover is a great data transfer program that makes moving from an old computer to a new computer so much easier then in the past.
We highly recommend you watch the user videos over at http://www.howtotransferfiles.com This website created some how to videos on using the PCmover software.
PC mover Professional Review
Company: Laplink Version: 5.0.615
Operating Systems:Windows XP, Vista, Windows 7, Media, Center, Windows 2000
Price: $59.95
What It Does
Transfer all user profiles, data files, folders, photos, email, contacts, and calendar
– PC to PC
Product Details
After agreeing to all the notices(at least 3), which inform you of the potential system problems that could occur with lost settings, provoke re installation of applications, or configurations that are not transferred, the process begins. That had me suspect and uncomfortable from the starting point of this review.
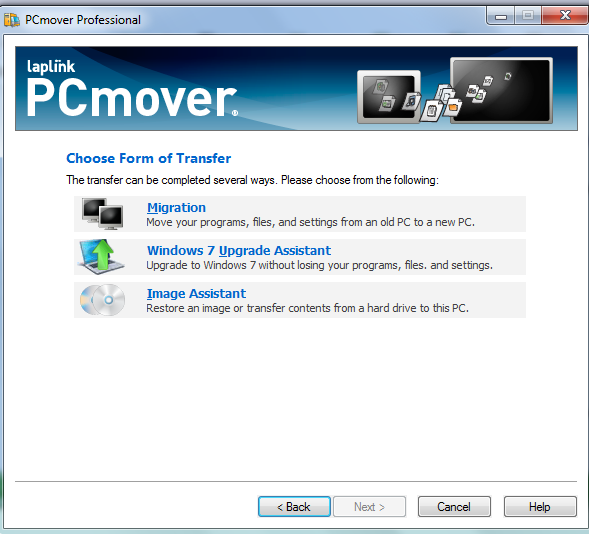
When you launch the product you are immediate sent into a wizard which, after checking that you are using the latest product update, you are presented with 3 choices: Migration, Windows 7 Upgrade, and Image Assistant

Even though the second option allows an upgrade from a previous Windows install to the new Windows 7, Microsoft provides this provision in their upgrades from one version to the next, so this may be used much less than the other two choices.
Prior to the transfer process, there are several preparations or disaster recovery actions you should take.
First, backing up your system is always the first priority and is HIGHLY recommended before you make any changes to either computer. Sometimes files are overwritten by these transfer programs and it could be a catastrophe if you lose, let’s say all your accounting records for 2011 from a Quickbooks file. LapLink recommends that you install Laplink DiskImage or Registry Booster , both as free trials.
DiskImage can be used as a drive backup option. Additionally, you always want to prevent moving viruses, and spyware into the new destination, so use a good virus removal program before you create a backup or transfer.
Registry Booster will clean up the registry by removing missing or unnecessary registry entries in the various hives of the windows system. This is more important when you’ve selected option three(creating an image). For those reading this who are unfamiliar with the registry, just consider it your computer’s library of congress where any and all settings, programs and files locations are packed into a segment in your hardrive.
You are directed to exit from PC Mover, run the above preparation steps, and once the installation for Registry Booster is completed restart the PC Mover program.
Another action you should take when using the imaging option of the software is to make sure the disk drive size on the destination drive contains the same space or more that the source drive. If you lack enough space on the destination drive for the incoming files, the transfer will fail. Disk imaging is very particular about drive sizes and partitions, so make sure you make the proper allocations.
Third, Internet Explorer should be the same on each system, or on the new computer it should contain the newer version.
Fourth, it is not recommend that you transfer programs from one system to the other, especially if the destination system already contains that program. Again, this could result in the loss or corruption of necessary application files, rending your Quickbooks or other installed programs inoperable. You are given an option during the install to select what specific files, applications or folders should be transferred.
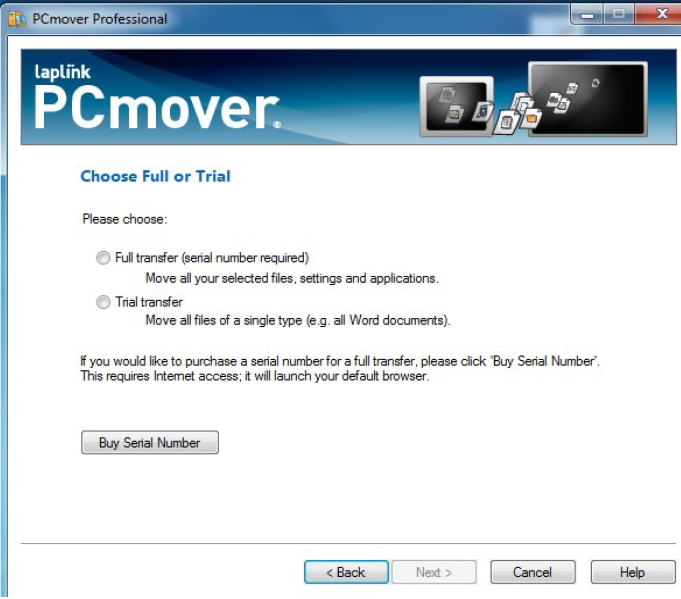
The process to move data between two system is done when you create the main file to be moved, called a snapshot. The snapshot is saved and will be transferred to the new or destination computer. Go to the destination computer browse out to the location of the saved snapshot from the source computer. I used an usb drive to move the files, which I found quite handy. Other options include other external drive storage(CD, DVD, ISB stick), a LapLink ethernet cable, network connections, or a parallel cable for older computers without USB drives. Once the snapshot is loaded, you again have some choices for file transfer: Full(which moves everythingfiles, programs and settings), or Trial move of only specific files types.

You do have the option of forgoing this step, but doing so will create an increased file size. However, it may be a preferred option if you are moving the data to a temporary storage location, or to more than 1 other computer.
A transfer file with the following file name “yourPC’sname Snapshop.pcs” contains the snapshot of the system. When you open the file in the destination computer, you select which settings and data files from a specific computer account, which some households have one computer that family members share, so they would have multiple user accounts. Once you select the accounts, you can also choose whether that account should be a regular, guest or administrative user on the destination system.

The snapshot is parses the file and extracts the required settings, applications or data files. This could be a lengthy process depending on the hard drive size of the originating system, the number of installed programs and stored data files. Afterwards you can select where this information should be placed in the new computer, whether in the local C drive, or an additional location.

If you make the choice to transfer files only(third option from the beginning menu choices) the option ” *******Do No Transfer This Drive” is shown, which might be applicable if you believe there is a virus*******. Sometime a large computer may contain multiple partitions and this choice would be applicable in this instance. You can also exclude certain files and folders the transfer and the system automatically senses system folders that should be excluded and marks them with a red X omission symbol(ex. Recycle Bin, System Volume Information, etc). In addition to excluding specific folder, you are also given the option to various exclude file types. The software suggest .TMP, >BAK. and other temp files ~$*.DOC, ~$*.PPT.
During the next stage of the transfer process. A moving journal file (*.pcv) is built, which contains all the files that will be moved to the new machine. I selected only my documents folder and two other data folders which were done rather quickly(less than 45 seconds). The file size was just 502 megabytes, containing 271 files. The system will compress this when the actual file is migrated.
The software instructs you to create a snapshot first then move the old computer and build the moving van, but it doesn’t present this in a clear fashion. What is needed is to run the same process on the destination computer so that you can move the files into it. There is no “moving van” menu, or any menu options as most all other software programs provide. Is the moving van the Migration choice, the Windows 7 option or the ImageAssistant, because those are the only options displayed when you start PC Mover on the destination computer. However, once you create the snapshot, enter the email address for the job complete notification, you will be shown the moving van screen, if you have chosen to move files only. This process seems to be a bit out of order to me. Why give the end user fields for an email address to tell the system you when the process is complete before it’s completed?? That should be the last step.
Finally, after all this preparation the file transfer begins and moments later I received a message in my email account that the transfer had complete.
The third option is to Restore an Image or migrate the contents of a hard drive to the local PC(where PC Mover is installed).
You must either connect the old hard drive to the new pc, or mount the drive as an image file. I used an external drive as I had an image of an older drive store on it. Once I figured out how to mount the drive, the system proceeded to create an image from the old image and rebooted my Windows 7 pc. Upon the reboot, I was shown two partitions, the PC Mover image and my existing Windows install.
The one feature I found worthwhile is that you can UNDO the transfer if you decide. Restart the program and after the first few pages of the wizard ( update check, license acknowledgment), just select UNDO
Security
Windows security is invoked when copying files into destination folders.
Installation
Simple installation but complicated instructions.
Knowledge Level
Novice = 3 Intermediate = 2 Expert = 1
Configuring the software and following the synchronization process will frustrate most novices.
Technical Support
Given the complexity of this product, thankfully a list of technical support options are offered. A Frequently Asked Question section, and a Knowlegebase can be searched for installation and configuration issues. Quick Start Guides are provided for basic installation and operations. Chat with a company representative is offered for resales and customer service questions as well as technical support. Additionally LapLink offers the option to submit a help desk ticket via the website. If you like to speak directly to the troubleshooting staff, live support hours are from 9:30AM-8PM EST and Saturday support hours are from 11AM to 5PM. No support is provided on Sundays.
License Model
Each pc that will transfer files will require PC Mover installed. One copy can be installed on both computers at the same time.
Extras
None. I highly recommend those that want to purchase this program purchase the retail PRO version online. This way you get the data trasnfer cable as well. The data transfer cable makes the trasnfer that much smoother. While you can transfer over a network, the direct computer to computer transfer is faster and less error prone.
Conclusion
Overall this transfers programs, files, folders and system settings. It is also the only program I am aware of that will transfer over software programs from the old computer to the new one. Users may have a little dificulty setting this software up. The user interface while complete does not always seem to make it’s self clear to the end user.

