Different computers have different power needs. Sometimes a computer may need its full resources most of the time so it needs full power. On the other hand, other computers may be able to get by with limited power. Furthermore, the type of computer can play a role. A laptop, for example, may need to conserve as much power as possible when running on a battery. But, it does not need to have its power profile limited when it is on AC power. The same can be said for a desktop.
Windows 7 gives users the ability to create different power profiles for different scenarios and different types of computers. This article will show you how you can easily edit those profiles for your needs.
The first thing you need to do is get into the power app. There are a couple of different ways to get to it. It is found in control panel so if you know how to get in there you just need to find the app. Otherwise you can hit WINDOWS KEY + R to get to the run dialog box. Once that opens you can type powercfg.cpl to go directly to the app.

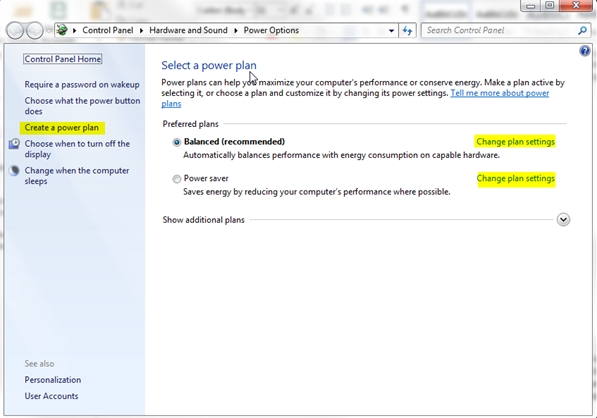
Once inside the app you can change to one of the preconfigured profiles. These include Balanced, Power Saver and High Performance. It is probably best to pick Power Saver for a laptop on battery and High Performance for a desktop that you never want to go to sleep. Balanced is good for computers that are on AC power, but ones that need to conserve power when not being used. They will go to sleep and conserve energy. For a business with lots of computers this can save a bundle. However, if you have a computer that needs to stay on like one that needs to be accessed remotely then you need the HIGH PERFORMANCE option.

These default plans will cover most situations that you will encounter. However, you can tweak three profiles or create a custom one for your situation.
If you want to tweak one of the default profiles you can click on “Change Plan Settings” to edit the different options. However, if you want to create a new one you need to click on “Create a Power Plan” on the left menu.
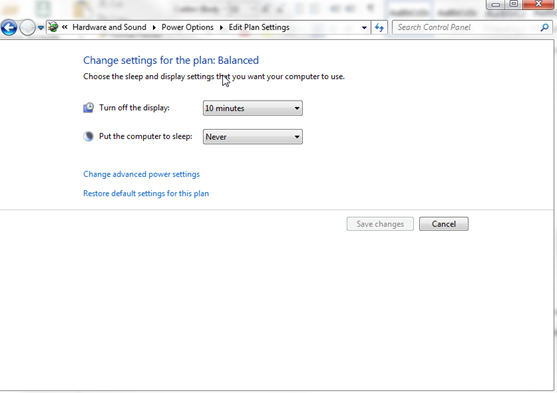
If you edit a power configuration you will see the following window:

From here you can select when you want the display to turn off and when you want the computer to go to sleep.
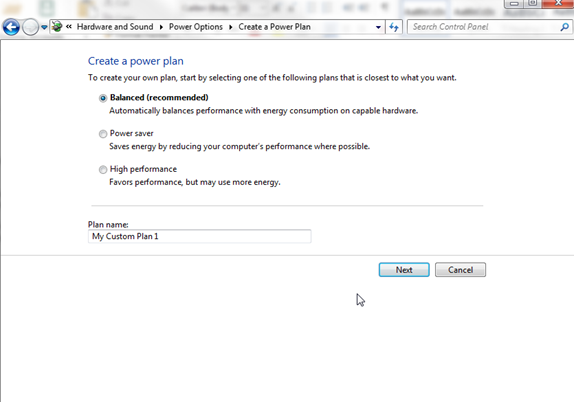
If you decide to create a new power plan, you will walk through a Wizard to create a new plan.
In first screen you will want to select a plan type and name it:

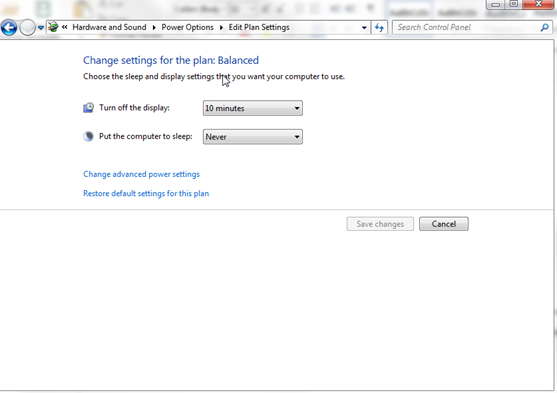
Then in the next plan you can select the sleep settings and the display shut down settings:

As you can see, creating a power plan is pretty simple. Hopefully, this article will show you how to properly complete this simple process.