The traditional procedure for flashing your BIOS from within DOS using a floppy disk is similar for all motherboard manufacturers.
It starts by making a couple of MS-DOS Startup Disks. The following describes how to do this for either a Windows 98 or Windows XP environment:
Windows 98:
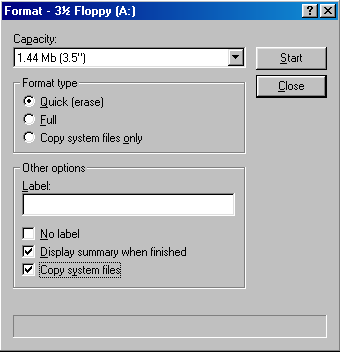
- Double-click the My Computer icon from your desktop, select your A: drive and right click to select Format.
- Select the Quick (erase) Format type, check both the Display summary when finished and Copy system files options and press Start.
- After the floppy has been formatted, press Close.

Windows XP:
- Double-click the My Computer icon from your desktop, select your A: drive and right click to select Format.
- Select the Create an MS-DOS startup disk format option and press Start.
- After the floppy has been formatted, press OK.
You’re now ready to carry out the BIOS flashing procedure, as follows:
- First copy the Flash utility program downloaded previously to one of the MS-DOS Startup Disks.
- Put the MS-DOS Startup Disk into your floppy drive and restart your system.
- As soon as POST starts, press the appropriate key – generally DEL – to enter Setup.
- From the Main Menu go to the Advanced BIOS Features and ensure that your floppy drive is specified as your First Boot Device.
- Follow the instructions to Save your changes and Exit Setup.
- The system will now boot from your MS-DOS Startup Disk and you’ll be presented with an A: prompt.
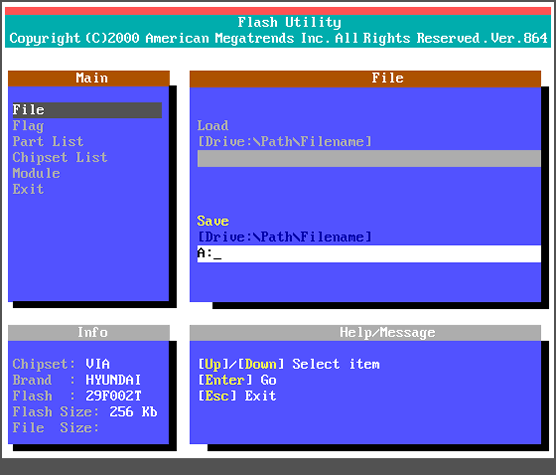
- Type the name of the flash utility – in this case: flash864
Press Enter.
- On the screen that appears, follow the instructions for saving your current BIOS to the first MS-DOS Startup Disk.
- When the Save has completed successfully, press Esc and then Exit.
- Now copy both the Flash utility program and latest BIOS version downloaded previously to the second MS-DOS Startup Disk. Make certain both files are uncompressed versions.
- If your motherboard has a Flash BIOS jumper, make sure this is set to allow your BIOS to be written to.
- Put the MS-DOS Startup Disk into your floppy drive and restart your system.
- The system will boot from the MS-DOS Startup Disk and you’ll be presented with an A: prompt.
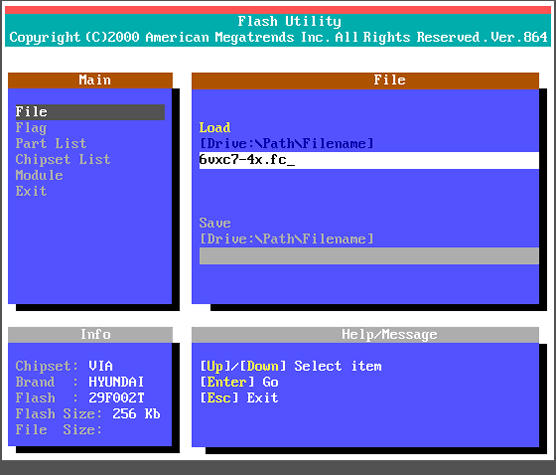
- Type the name of the flash utility followed by the name of the file containing the BIOS update – in this case: flash864 6vxc7-4x.fc Press Enter.
- The following screen appears:
- Press Enter and Enter again when you’re asked to confirm that you wish to flash the BIOS.
- Press Exit when invited to do so when the flashing process is complete.
- Remove the MS-DOS Startup Disk from your floppy disk drive and restart the system.

This MS-DOS Startup Disk will now serve as a backup, providing an option for reverting to the current BIOS version should anything go wrong with your update.

You should under no circumstances terminate or interrupt the flashing process.
In general, flash BIOS corruption is caused by incompatible add-in cards, aborted flash updates caused by power supplies or power fluctuations, or improper BIOS images. These failures can be caused by inconsistent process issues and are not normally device or motherboard related problems. Since most newer BIOS code used today includes an option known as Boot Block Protection, such failures can often be reliably recovered.
A Boot Block type BIOS is divided into two distinct sections. The first section – the so-called Boot Block – contains information necessary to initialise only critical system devices such as the processor, memory and ISA video devices as well as the floppy drive. The Boot Block is write protected and can not be over written by a BIOS flash utility.
The second section is the System Block, which contains the information necessary to initialise all other system devices such as the video system, input devices, storage devices, COM ports and peripherals and performs the Power On Self Test.
The precise details for recovering from a corrupted BIOS varies for the different BIOS distributions, but typically involve recovering a working version of BIOS code from a floppy disk. In one case, use of an ISA video adapter card will avoid you having to perform the recovery procedure blind!