Make sure the power to your computer and any external peripherals are off and your computer is unplugged from its power source. If you haven’t already removed the cover from your system case, do so now.

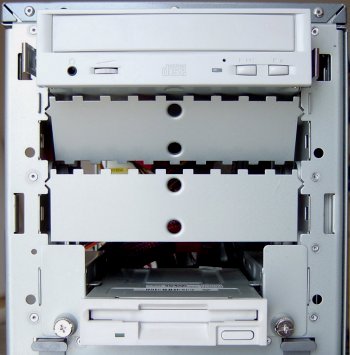
This particular system case allows the top half of the front bezel to be detached to reveal three 5.25in external drive bays and a 3.5in bay assembly capable of holding two 3.5in devices. Remove this and remove the middle drive bay’s plastic cover panel by popping it out from the bezel.
If the bay is also covered by a metal plate, remove this by carefully twisting it back and forth until it breaks off. Be careful of the newly exposed metal were the grills were attached as these areas are likely to be sharp.

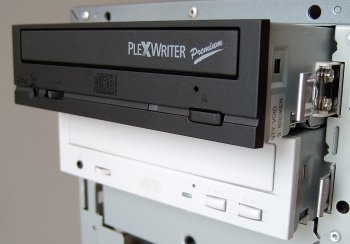
Determine if you must install mounting rails on the sides of your drive. To do so, insert the drive into the open bay. If the drive fits tightly with little or no clearance on either side of the drive, the drive can be mounted directly into your computer, without the use of drive rails.
If you must use mounting rails, screw the rails into the lower pair of holes on either side of the drive. Make sure the metal portion is angled away from the device and facing forward.
Check their positioning by sliding the drive into the bay.
If necessary remove the mounting rails and fix them to the the other pair of holes.
When it’s apparent that the mounting rails are correctly positioned, push the drive into the bay until you hear a click, indicating that the dive has properly located.
- Drive Installation Terminology
- CD-RW Installation Intro
- CD-RW Installation Configuration
- CD-RW Installation Mounting
- CD-RW Installation Connection
- CD-RW Installation Bios Setup
- CD-RW Burning Software
- CD-RW Installation Optimization
- Floppy Installation Intro
- Floppy Installation Mounting
- Floppy Installation Connection
- Floppy Drive Installation BIOS Setup