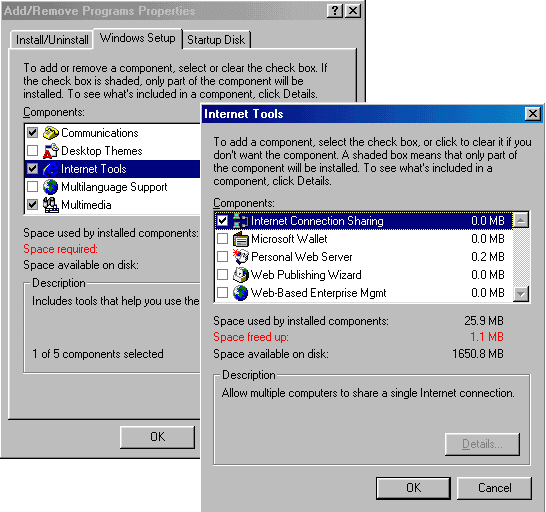
The final task is to fine-tune your Windows installation, especially if you elected to Install the most common components during the course of the installation.
You can do this by clicking Start > Settings > Control Panel > Add/Remove Programs and then selecting the Windows Setup tab. Setup searches for and displays the installed components. The check boxes indicate whether or not a component is installed, shaded check boxes denoting that only part of the component is installed.
Internet Connection Sharing is one of the most new significant features in the Windows 98SE Update. It’s also a good case in point with respect to the Add/Remove Programs feature, since it isn’t installed by default.

The Description window indicates how many components are installed out of the number available. Clicking Details brings up a second dialogue box which describes precisely what’s installed and what isn’t. Select or clear check boxes to modify your selection as required. The net change in the disk space requirement will be shown. When you’re happy with your current selection, click OK. You’ll be asked to load the Windows 98 CD-ROM. The selected components will then be installed.
- Win98 Installation Planning
- How To Create A Windows Start Up Disk
- Installing Windows 98 – Getting Your CD Drive to Work for Installation
- How To Create A FAT32 Partition on Your Hard Drive
- Win98 Installation Drive Formating
- Win98 Installation
- Win98 Installation Phase 1
- Win98 Installation Phase 2
- Installing Windows 98 – Copying the Windows Files to Your Computer
- Restarting Your Computer After Installing Windows
- How To Do a Clean Installation of Win98 – Phase 5: Setting Up Hardware and Finalising
- Installing Windows 98 – Upgrading to Win98SE
- How to Update Microsoft Windows with Patches and Service Packs
- Win98 Driver Installation
- Win98 Installation Tuning