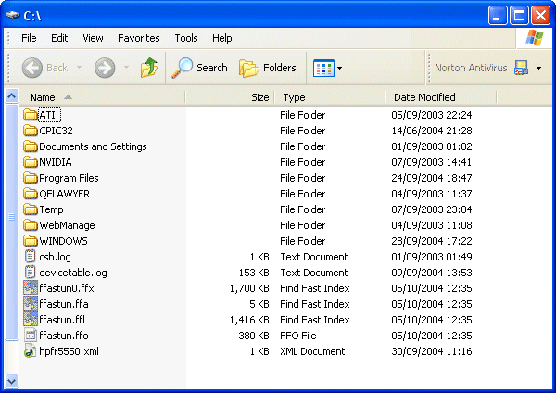
You can confirm that the Find Fast Indexer is installed by checking for its associated file set, located in the folder in the topmost level in the hierarchy of indexed folders. So, assuming that the entire :C drive has been indexed, the files will appear in the :C root.

Remember, by default the Find Fast files are hidden files, so you’ll probably need to adjust your Folder Options settings to be able to see it via Windows Explorer.
Do this by clicking Tools and then Folder Options. Select the View tab, and ensure Show hidden files and folders is checked.
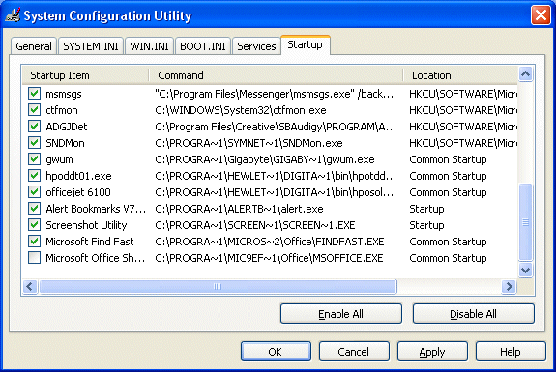
You can also confirm it’s presence in the Startup program group by running the System Configuration Utility.
Do this by clicking Start > Run, typing msconfig.exe, pressing OK and selecting the Startup tab.

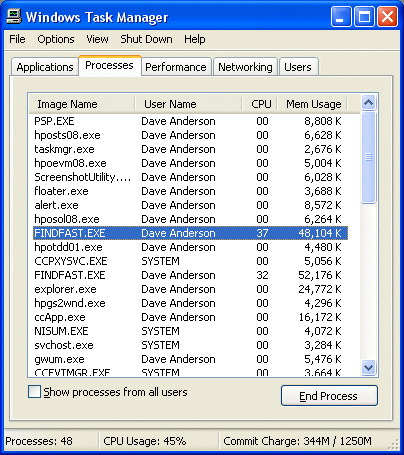
Having confirmed that the Find Fast Indexer is installed on your PC, you may wish to go a step further and confirm that it is indeed responsible for the thrashing that you’re seeking to eliminate.
You can do this by invoking the Task Manager – by pressing Ctrl/Alt/Delete – while this is occurring.
If it is indeed Find Fast that’s responsible for hogging your CPU, it’ll be quite apparent!
