Sharing your broadband Internet across multiple computers is simply a matter of connecting the other PCs to the local network and setting up their IP configurations in the same way as previously.
Extending the range of a wired Ethernet home network is well within the scope of anyone with even modest DIY skills. You’ll need appropriate lengths of UTP Cat5 cable, and their are advantages – in terms of flexibility – if you terminate these at appropriately located RJ45 surface mounted wall boxes, rather than making direct connections between the modem/router and PC hosts.
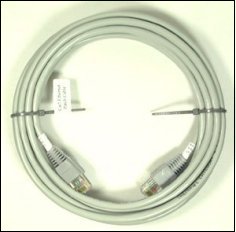
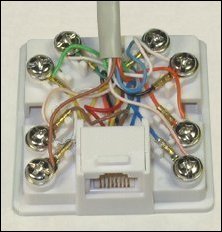
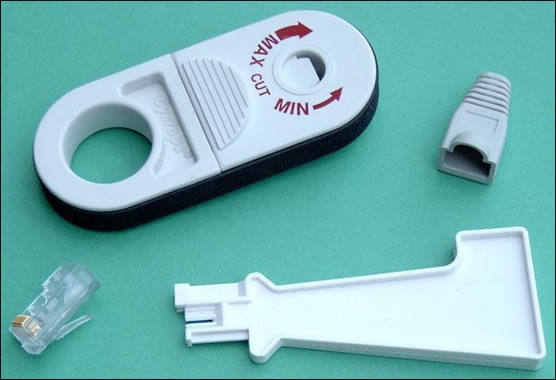
As well as some conventional tools – hammer, screwdriver and perhaps an electric drill for going through the occasional wall! – you’ll also need a UTP stripper and RJ45 crimping tool. Get yourself an appropriate number of RJ45 plugs and plenty of cable clips for securing the UTP cable to your door frames and skirting boards, and you’re all set!
Of course, a wireless Ethernet network is a viable alternative these days, with many modern-day ADSL modem/routers being available in versions that can handle both wired and wireless networking. Whilst this has obvious advantages in terms of convenience, it is more expensive to implement and – despite significant improvements over recent years – wireless Ethernet still has inferior performance than wired Ethernet.
Once your other host systems have been physically connected to your private network you simply need to set-up each machine’s IP configuration following the same procedure as before. This is repeated below, but in the context of Widows XP Home Edition (rather than Windows 98) this time:
- From the Start menu, select Settings, Network Connections and then Local Area Connection.
- Check that the list includes Client for Microsoft Networks, and Internet Protocol (TCP/IP). Select the latter and click Properties.
- Select the Obtain an IP address automatically option and enter any DNS server addresses, as directed by your ISP.
- Click Advanced and select the WINS tab. Unless advised otherwise by your ISP, select the Default NetBIOS setting option.
- Click OK and restart the machine so that the changes can take effect.
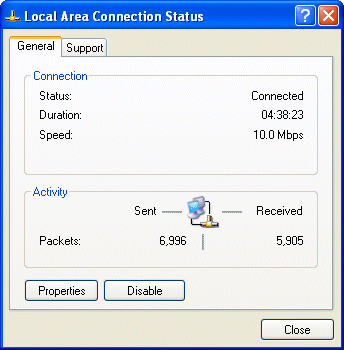
Click Properties.
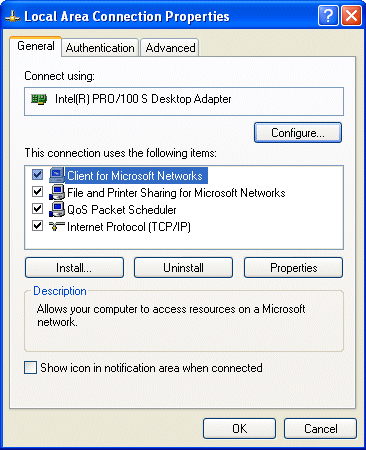
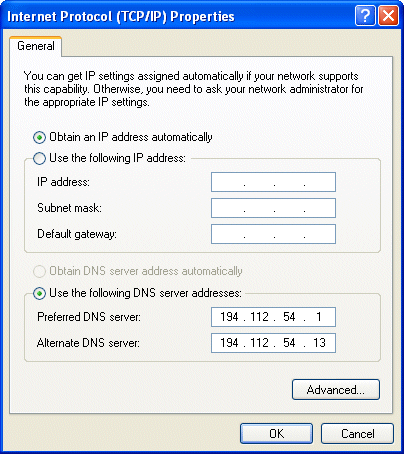
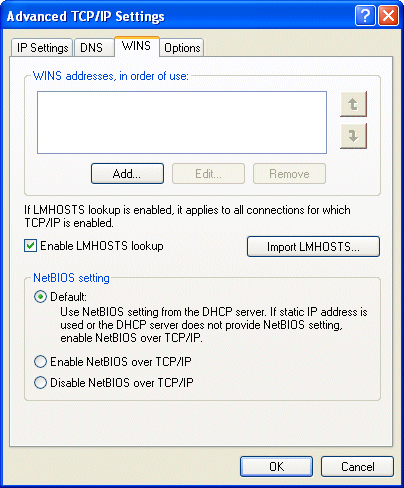
If asked, either insert the Windows XP CD or enter the location of the .cab files.
Versions of Windows since Windows 98SE have included an Internet Connection Sharing (ICS) component. The advent of wire-only ADSL services has dramatically increased the the availability of affordable broadband modem/routers, and consequently reduced the relevance of ICS. However, it remains a viable low-cost option for some users, for example those with a single-user USB broadband modem.
The Internet connection can be either a dial-up connection an always-on broadband connection. If you’re using an ADSL or cable modem that uses a network connection, the ICS host computer will need a second network card.
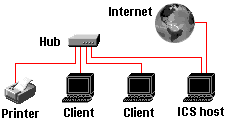
With ICS, one of the computers on your network – the one with the connection to the Internet – is designated as the ICS host and the other systems on the network access the Internet connection via the ICS host computer. The ICS host accomplishes this by effectively performing a number of router functions, such as a simplified DHCP service for assigning private IP addresses, DNS name resolution and Network Address Translation between private and public IP addresses.
The following provides a brief overview of the installation and configuration of ICS:
To install ICS on your designated host computer click Start –> Settings –> Control Panel –> Add/Remove Programs and then select the Windows Setup tab. Setup searches for and displays the installed components. Scroll down through the Components list, select the Internet Tools component and click the Details button. Check the box alongside the Internet Connection Sharing option. Click OK to close the Internet Tools box and OK again to close the Add/Remove Programs Properties box. Setup will then install the feature.
The Internet Connection Sharing Wizard will now launch and guide you through the process of creating the Client Configuration Disk, used subsequently to configure the other computers on your network to communicate with the ICS host computer. After the wizard has created the disk, click Finish and restart the system.
On each of the client computers, open the Control Panel and double click the Network icon. Scroll through the list of components and select the TCP/IP component that relates to your network card. Check that the properties for this are set correctly:
- On the IP address tab ensure the Obtain An IP Address Automatically check box is selected.
- On the Wins Configuration tab, ensure the Use DHCP for WINS Resolution check box is selected.
- On the Gateway tab, ensure the Installed Gateways list box is empty.
- On the DNS Configuration tab ensure the Disable DNS option is selected.
Finally, run the Browser Connection Setup Wizard on each of the client computers by inserting the Client Configuration Disk into the floppy disk drive and, from the Run dialog box on the Windows Start Menu, typing a:icsclset.exe and clicking OK. Follow the on-screen instructions through to completion, when you’ll be invited option to connect to the Internet immediately. You’ll now be able to access the Internet simultaneously from all computers on your network.
The following Microsoft Knowledge Base article links provide further detail on the installation and configuration procedure for different Windows environments and other supplementary information:
- Article 234815: Description of Internet Connection Sharing.
- Article 324690: WebCast: Internet Connection Sharing with Windows 98 Second Edition and Windows Me
Internet Connection Sharing with Windows 98 Second Edition and Windows Me WebCast transcript.
- Article 230361: ICS Does Not Work If You Reinstall Windows 98 Second Edition.
- Article 230087: Description of the Microsoft Browser Connection Setup Wizard.
- Article 310563: Description of Internet Connection Sharing in Windows XP.
- Article 269699: Internet Connection Sharing Settings Are Not Migrated When You Upgrade to Windows 2000.
- Article 229842: Using Internet Connection Sharing with User Profiles.