There are a number of important hardware factors when transferring your VCR to digital video. For most people a balance needs to be struck when buying PC hardware for any purpose, compromising somewhere between performance and cost. On this page we’ll take a look at the main considerations:
- the video capture card
- sound capabilities
- CPU
- RAM
- Hard drive – speed and capacity
- PC interfaces
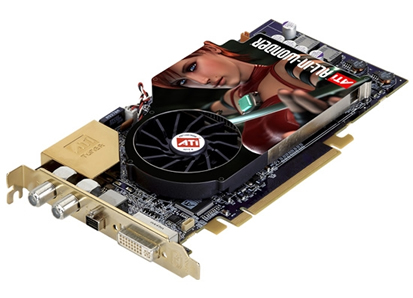
Video capture cards essentially provide a PC with a video ADC system. They allow a user to convert analogue video tapes in to a digital format which can be stored and manipulated on a computer. The digital video data may be stored in an uncompressed or raw format, but this is rare as the file sizes quickly become enormous. Far more commonly the files are compressed using a codec – a file compression method.
Early video capture cards employed a hardware Motion-JPEG codec, which used the still image JPEG compression method on each video frame to achieve smaller file sizes while retaining editing capabilities. Later, the huge success of digital video (DV) based camcorders in the late 1990s led to the creation of purpose developed DV codecs. (Refer back for more on digital video compression.)
The best capture cards deal with most of the codec processing onboard using their own GPU and RAM, leaving CPU and motherboard resources available for higher level activities. However, these can be costly, and in any case may have unnecessary power for most home users. Less expensive capture cards will compromise more with software to perform the codec work. This will make more demands on the PC’s own hardware resources, so a fast CPU and motherboard with plenty of RAM is essential. Check the system requirements for a number of video capture cards carefully, before you purchase, comparing several manufacturers and models to get an idea of what can be achieved for your budget.

An all in one graphics card equipped with suitable video input connections can prove a more economic alternative to a dedicated capture card.
Some video capture cards keep their price down by omitting their own sound recording hardware, instead providing pass through connectors that allow audio input to be directed to the host PC’s sound card. This isn’t a problem for simple editing work, but without dedicated audio hardware problems can arise in synchronising the audio and video tracks on longer and more complex edits.
A popular solution is the use of an external converter box in which the codec is embedded in hardware. The video and audio output from your VCR will be connected to the appropriate connectors of the capture device, which streams the digitised format to the PC via either a USB2 or FireWire interface. As well as DV, such devices can typically encode to most varieties of MPEG formats.
As mentioned above, the amount of work your PC’s processor has to perform during video capture will vary depending on the capture device being used. If it’s an external converter box, the processing load on your CPU will be less than if it’s an all-in-one graphics card. However, there are other phases of a conversion from video cassette tape to DVD – such as video editing and the transcoding of digitised video streams – that are CPU-intensive, and generally speaking a processor of at least 1.5GHz and a minimum of 2GB of memory is recommended.
During video capture the ability to write the digitised video to hard disk in real time is of critical importance. The total data stream for DV amounts to 3.6BMBps, so your system needs to support this sustained rate of transfer to hard disk to avoid dropped frames. This rate of transfer also dictates that external converter boxes need to have either a FireWire or USB2 interface. USB1.1 models – which have a bandwidth of only 12Mbit/sec compared with USB2’s 480Mbit/sec – simply aren’t up to coping with streamed DV.
DV also has implications with respect to file sizes. Firstly, you need to ensure you’ve enough disk space to accommodate the amount of digitised video you’re going to be producing. In calculating this you need to take account of temporary files that will be produced during processing as well as the final digital video files themselves. Moreover, you need to be aware that the FAT32 files system, used by Windows 98 and ME and an option under Windows XP, has a file size limit of 4GB. The NTFS file system used by Windows 2000 and XP doesn’t have this limit.
There is another option that wins hands down in terms of simplicity, and doesn’t involve use of a PC at all. That is to use a standalone DVD Recorder/VCR combo unit. These devices provide a one-touch copy function that’ll allow you to copy a tape to DVD in one of a number of different qualities, typically XP (1 hr/disc), SP (2 hrs/disc), LP (4 hrs/disc) and EP (6 hrs/disc).
As well as VHS-based source you can connect both external analogue and DV devices, and while it may be somewhat limited you have the ability to edit your captured footage, insert chapter points, and create a playlist menu.
For the purposes of the rest of this tutorial, we’re going to use an external analogue-to-digital converter box.
- Transfer VHS to DVD Method
- VCR to DVD – Video Digitisation and Compression Codecs
- VCR to DVD Conversion – Video Capture Cards and PC Hardware
- How to Transfer VCR Video to DVD – Preparation
- Converting VCR Video to DVD Using Canopus ADVC-55
- Connecting External DV Converter Hardware to VCR and PC for VHS Video to DVD Transfer
- Testing the External DV Converter
- Installing the Software for the ADVC-55 DV Converter – including NERO
- One-Click Operation of VHS Video to DVD Transfer Using ADVC-55
- Rip / Import / Copy VCR VHS Video and Burn to DVD with Nero
- Labelling your DVDs – tutorial on how to transfer your VCR tapes to DVD
