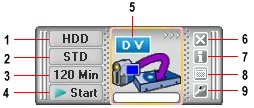
Once you have installed the ADVC-55 software, double-clicking the Let’s CONVERT program icon causes a mini operating screen to appear above the Windows System Tray. This provides one-click control of tape to DVD conversions with the following functions:
- Specify where video is to be recorded
- Specify video capture quality setting
- Select capture duration
- Start/stop button
- Right-click to show the settings menu
- Exit Let’s CONVERT
- Show Let’s CONVERT version number
- Show/hide video preview window
- Show operating screen settings menu
The quality options and video capacity in terms of duration vary depending on your selection for the destination for your digitised video – CD, DVD or your hard disk drive.
The table below summarises the key characteristics of the various video quality mode settings:
| Quality Mode | Settings | |
|---|---|---|
| Best quality
(HHQ) |
Video size | 720×480/576 (352×480/576) |
| Video Bit Rate | 9.0Mbps | |
| Sound Bit Rate | 320kbps | |
| Sampling Frequency | 48kHz | |
| Channel | Stereo | |
| High quality
(HQ) |
Video size | 720×480/576 (352×480/576) |
| Video Bit Rate | 6.28Mbps | |
| Sound Bit Rate | 320kbps | |
| Sampling Frequency | 48kHz | |
| Channel | 720×480/576 (352×480/576) | |
| Standard
(STD) |
Video size | 720×480 (352×480) |
| Video Bit Rate | 4.62Mbps | |
| Sound Bit Rate | 320kbps | |
| Sampling Frequency | 48kHz | |
| Channel | 720×480/576 (352×480/576) | |
| Long hours
(MQ) |
Video size | 720×480/576 (352×480/576) |
| Video Bit Rate | 3.64Mbps | |
| Sound Bit Rate | 320kbps | |
| Sampling Frequency | 48kHz | |
| Channel | 720×480/576 (352×480/576) | |
| Longest hours
(LQ) |
Video size | 720×480/576 (352×480/576) |
| Video Bit Rate | 2.98Mbps | |
| Sound Bit Rate | 320kbps | |
| Sampling Frequency | 48kHz | |
| Channel | 720×480/576 (352×480/576) | |
Figures in parenthesis represent video size when Reduce Load is specified.
Audio is all in MPEG-1 audio layer 2 format. For height and video size, the former is a value of NTSC, the latter is that of PAL.
If you want simply to copy a video cassette to DVD, without performing any editing at all, it really is a one-click operation!

We’re going to configure the operating screen to write the digitised video direct to DVD, using the highest quality MPEG-2 encoding, for a video duration that’ll fit on a single-layer DVD+R disc.
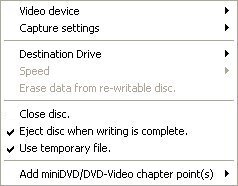
Display the settings menu to confirm the other settings are all as intended.
For example, that the Capture settings are as intended …

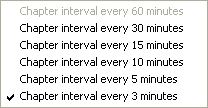
… and that the interval for automatic chapter writing is what you want.
Load a blank DVD+R disc …
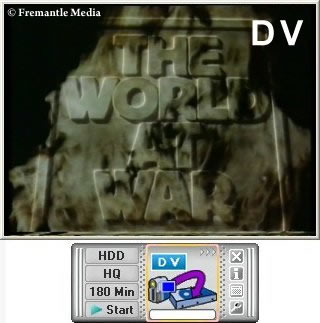
… cue the start of the video capture via the preview screen, and click Start to commence capture at the appropriate time.
You’ll be warned that the Close disc option should be checked …
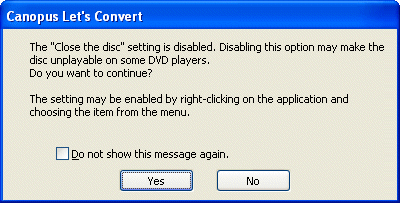
… to ensure the written DVD’s compatibility with the maximum number of DVD Players)
Restart the capture process after having returned to the settings menu to check the option.

Video capture progress is monitored via the operating screen.
When you’re nearing the end of the video footage you want to capture, use the preview window to stop recording at the precise time you want.
![]()
Capture only stops when you click on one of the options you’re presented with.
The Let’s CONVERT software now commences the DVD Authoring phase …

… again monitoring progress as it proceeds.

When this phase is complete it prepares for the writing of the DVD …

… performs the DVD Writing…

… followed by Writing Processing …
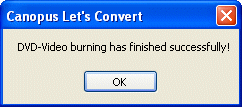
… before finally signalling that the DVD has been successfully created.
- Transfer VHS to DVD Method
- VCR to DVD – Video Digitisation and Compression Codecs
- VCR to DVD Conversion – Video Capture Cards and PC Hardware
- How to Transfer VCR Video to DVD – Preparation
- Converting VCR Video to DVD Using Canopus ADVC-55
- Connecting External DV Converter Hardware to VCR and PC for VHS Video to DVD Transfer
- Testing the External DV Converter
- Installing the Software for the ADVC-55 DV Converter – including NERO
- One-Click Operation of VHS Video to DVD Transfer Using ADVC-55
- Rip / Import / Copy VCR VHS Video and Burn to DVD with Nero
- Labelling your DVDs – tutorial on how to transfer your VCR tapes to DVD
