Connecting up the ADVC-55 external DV converter to your PC and VCR is fairly straightforward.
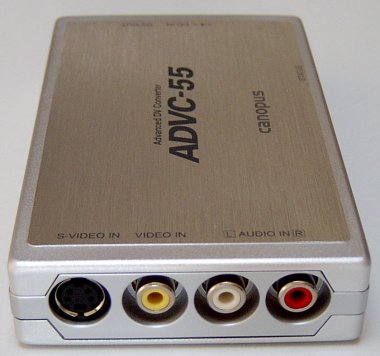
First, connect up either composite video RCA Phono or S-Video socket, and twin RCA Phono audio connectors …
… at one end of the Canpous device …
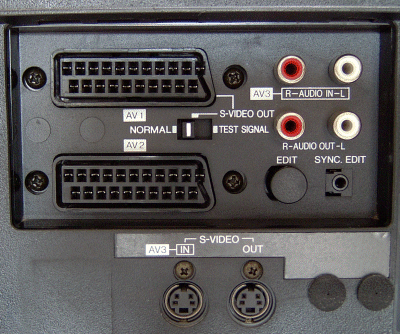
to your VCR.
Video capture devices generally always provide composite video and S-video connectors. If your VCR provides both, use the latter, since this will give a higher level of video quality.
Both types of connector have the same bandwidth. The sole difference between S-video (also known as Y/C Separated video) and composite video is that the former carries the chroma separate from the luminance, while the latter mixes them together. S-video’s superior performance stems from the elimination for the need for a chroma separator at the destination and the avoidance of any signal degradation that this can cause.
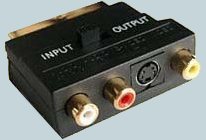
In Europe, it’s common for VCR players to have a only a SCART (aka Peritel or Euroconnector) connector.
In this case, you’ll need to use a suitable SCART-to-phono adapter set. Such adapters are generally available wherever video recorders are being sold.
Then connect the unit to your PC …
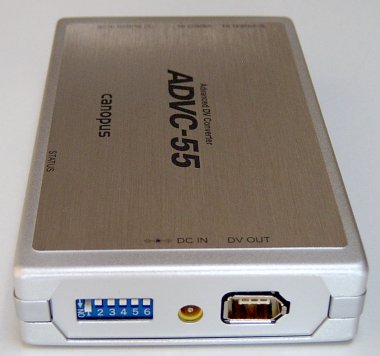
… by plugging in the FireWire cable to the other end of the unit.
Many modern-day motherboards provide a pin header that allows connection to a front-mounted IEEE-1394 port.
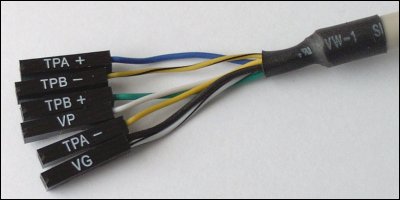
Typically, there are six wires coming from the system case’s front-mounted IEEE-1394 port, consisting of two sets of twisted pair cables (TPA and TPB), a power cable (VP) and a ground cable (VG).

The Intel Front Panel Connectivity Guide recommends the following design for a front-mounted IEEE-1394 connectors. If your motherboard is a recent design, it’s likely it will be identical, or at least similar.
| Pin | Signal name | Pin | Signal name |
|---|---|---|---|
| 1 | TPA+ | 2 | TPA- |
| 3 | Ground | 4 | Ground |
| 5 | TPB+ | 6 | TPB- |
| 7 | +12V (Fused) | 8 | +12V (Fused) |
| 9 | Key | 10 | Ground |
Connecting the wires to the pin header can be tricky. Where not all the pins are going to be used, it’s easy to inadvertently connect a wire to a wrong pin.
Take great care to avoid this, if you don’t want to risk seeing the external device disappear in a cloud of blue smoke!
The DIP switches are used to specify the appropriate video format (PAL, NTSC or SECAM) and to boost the audio level if you subsequently feel the volume converted sound is insufficient.
The ADVC-55 doesn’t require any driver installation, so as soon as you’ve done so …

… Windows should recognise the presence of the device …
… and ask you what you want it to do next.
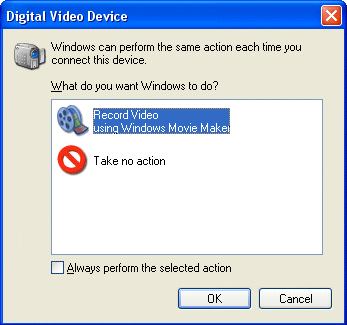
At this point it’s wise to run a trial video capture, to conform that the hardware is properly connected and working correctly. The native Windows XP Movie Maker application can be used for this purpose.
- Transfer VHS to DVD Method
- VCR to DVD – Video Digitisation and Compression Codecs
- VCR to DVD Conversion – Video Capture Cards and PC Hardware
- How to Transfer VCR Video to DVD – Preparation
- Converting VCR Video to DVD Using Canopus ADVC-55
- Connecting External DV Converter Hardware to VCR and PC for VHS Video to DVD Transfer
- Testing the External DV Converter
- Installing the Software for the ADVC-55 DV Converter – including NERO
- One-Click Operation of VHS Video to DVD Transfer Using ADVC-55
- Rip / Import / Copy VCR VHS Video and Burn to DVD with Nero
- Labelling your DVDs – tutorial on how to transfer your VCR tapes to DVD
